1 hour
1 Day Basic
2-4 Weeks Full
$6,000+ Saline
$6,900+ Silicone
Less Discomfort - Minimal Downtime
Common Concerns
- My breasts are too small, and I want a fuller, more feminine look.
- I’ve lost volume after weight loss, pregnancy, or aging, and my breasts feel deflated.
- My breasts sag, and my nipples point downward—I want a lifted, youthful shape.
- My breasts aren’t the same size, and I want better symmetry.
- I don’t have the cleavage I want, and clothes don’t fit the way I’d like.
- I want to feel more confident in my body with fuller, shapelier breasts
Frequently Asked Questions
Are they going under the muscle or above the muscle?
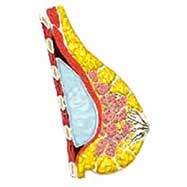
Submuscular (below the muscle) Breast Augmentation
In 95% of the cases, the breast implants will be placed in a submuscular position for two main reasons:
- More natural appearance
- Less risk of capsular contracture (scarring around the breast implant)
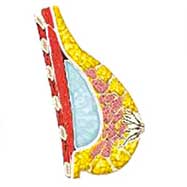
Dual Plane Breast Augmentation
This occurs when the implant is placed behind the muscle in the top 2/3 of the implant and behind the gland in the lower 1/3 of the implant. This is performed by surgeons who have experience in this technique in those patients who do not wants the scars from a breast lift but still want implants and they have some mild sagging to the breasts. The dual place creates a lifting and rotation of the breast tissue.
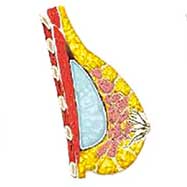
Subglandular (above the muscle) Breast Augmentation
This is performed infrequently due to the higher risk of capsular contracture. There are some patients who do benefit from this type of placement:
- Constricted or tubular breasts (better expansion with this technique)
- Sagging of the breasts but not interested in a lift
- These patients can have too much sagging
- They need to have thicker breast tissue to cover the implant
Breast Implant Incisions
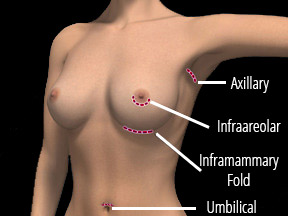
 Inframammary Fold Incision
This is the most common incision for breast augmentation because the scar is essentially hidden underneath the breast near the crease. You do not see it when looking in the mirror and it is hidden underneath all clothes, bras and bikinis. Great access and results from this incisions.
Infraareolar incision
Hidden along the color change and curve of the lower areola. Can be a very discreet scar in some patients. If it doesn’t heal well, then can be visible in a mirror. Slightly higher risk of infection and capsular contracture since dissecting near the breast ducts.
Umbilical Incision
Well hidden along the curve of the upper belly button. Also called the Scarless Breast Augmentation since there are no breast incisions. Can only be performed with saline implants.
Axillary Incision
Potentially the most visible incision if it doesn’t heal well since can be seen with tank tops.
Can bottoming out or implants falling to the side be fixed?
Breast Implant Malposition Correction: Breast implants can fall underneath the inframmamary fold (bottoming out) or fall to the side when lying down (lateral displacement). This usually can be corrected with tightening the pocket so that the implant cannot fall down or out. Sometimes extra material (such as Alloderm, Strattice, or other Acellular dermal Matrices) is needed to provide additional support especially in thin patients.
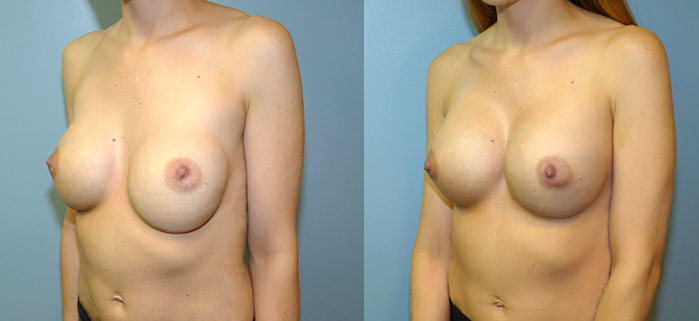
This patient had a breast augmentation by a different surgeon and was unhappy with the bottoming out and lack of cleavage. Dr. Ewart corrected the problem by placing a wider implant that better fit the patients frame, re-elevating the pectoralis muscle, and tightening the lower pocket. The patient was extremely happy with the results.
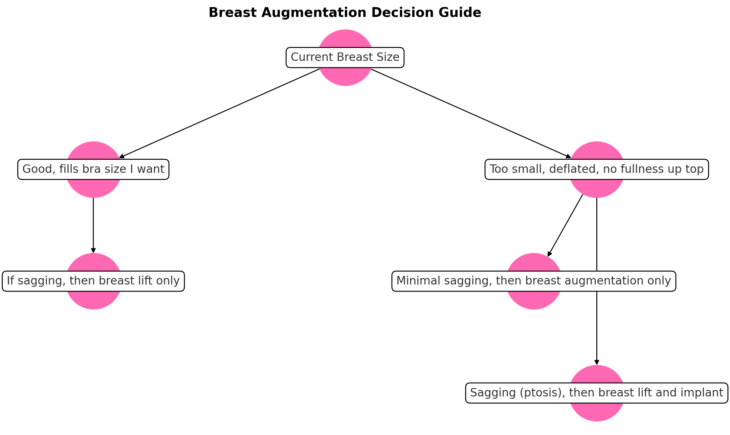
Do I need a breast lift or just an augmentation… or both?
This is the most common question we receive and also the most important decision to address during your consultation. Let’s make it simple by looking at the flow chart below.
How can I fix my uneven breasts (asymmetry)?
Uneven breasts or breast asymmetry is very common. In fact, almost every women if they look close enough will see that they have some difference between their breasts. For some women however, the difference can be very dramatic or noticeable. One side may be only an A cup while the other side could be a C cup. There are several reasons for this such as chest wall deformities which limit the growth and size of the breast or developmental abnormalities in which the breast does not develop properly or even at all.
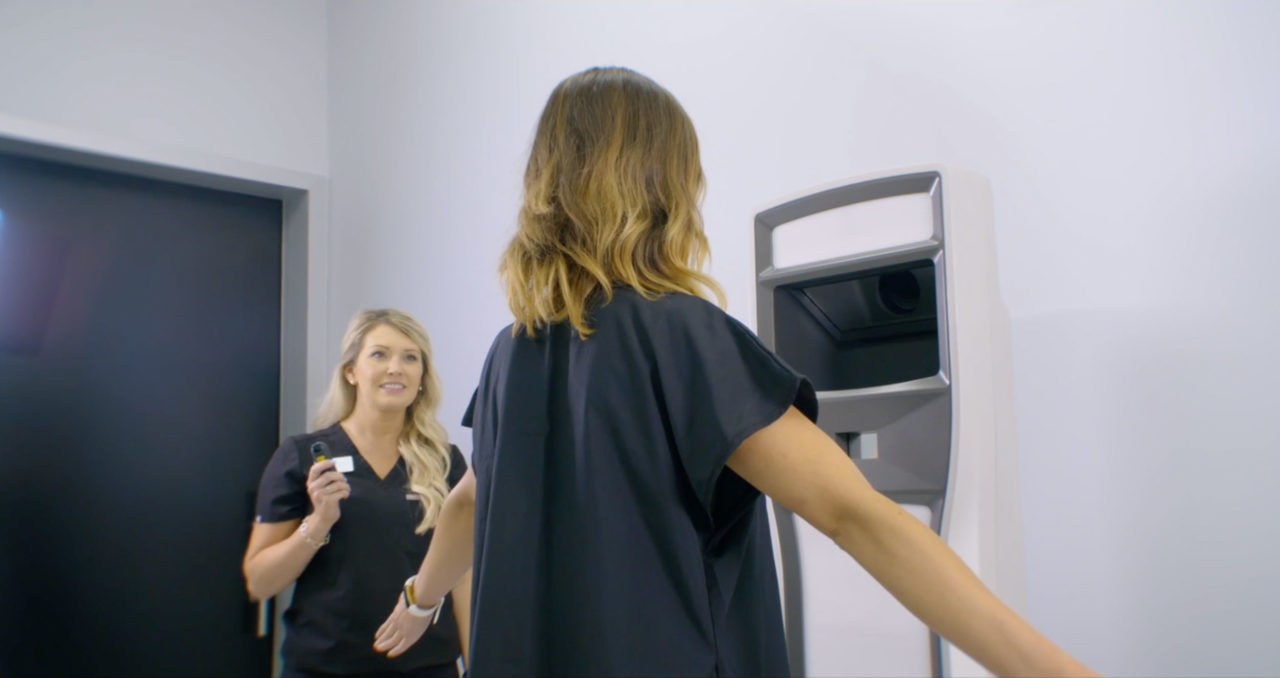
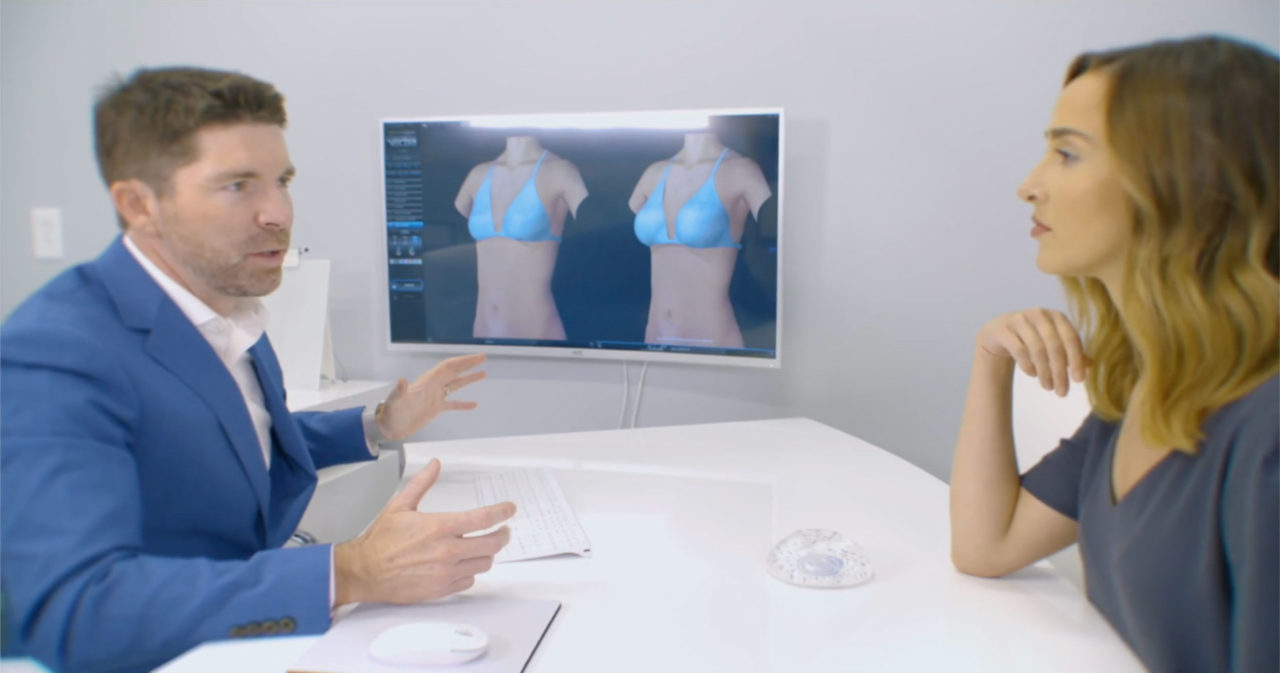
For chest wall deformities, the chest wall is more sunken in on that side and the breast may look normal but is smaller and does not project out as far. This is why 3D imaging with the Vectra is so important. It can detect chest wall asymmetries and allow us to chose a larger and high profile implant on the smaller side to provide the best result.
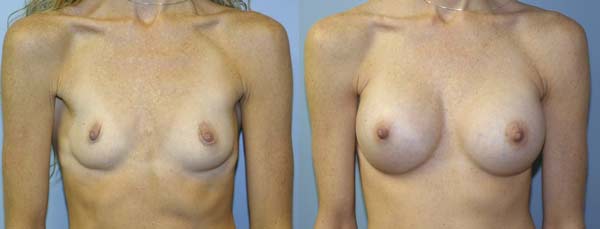
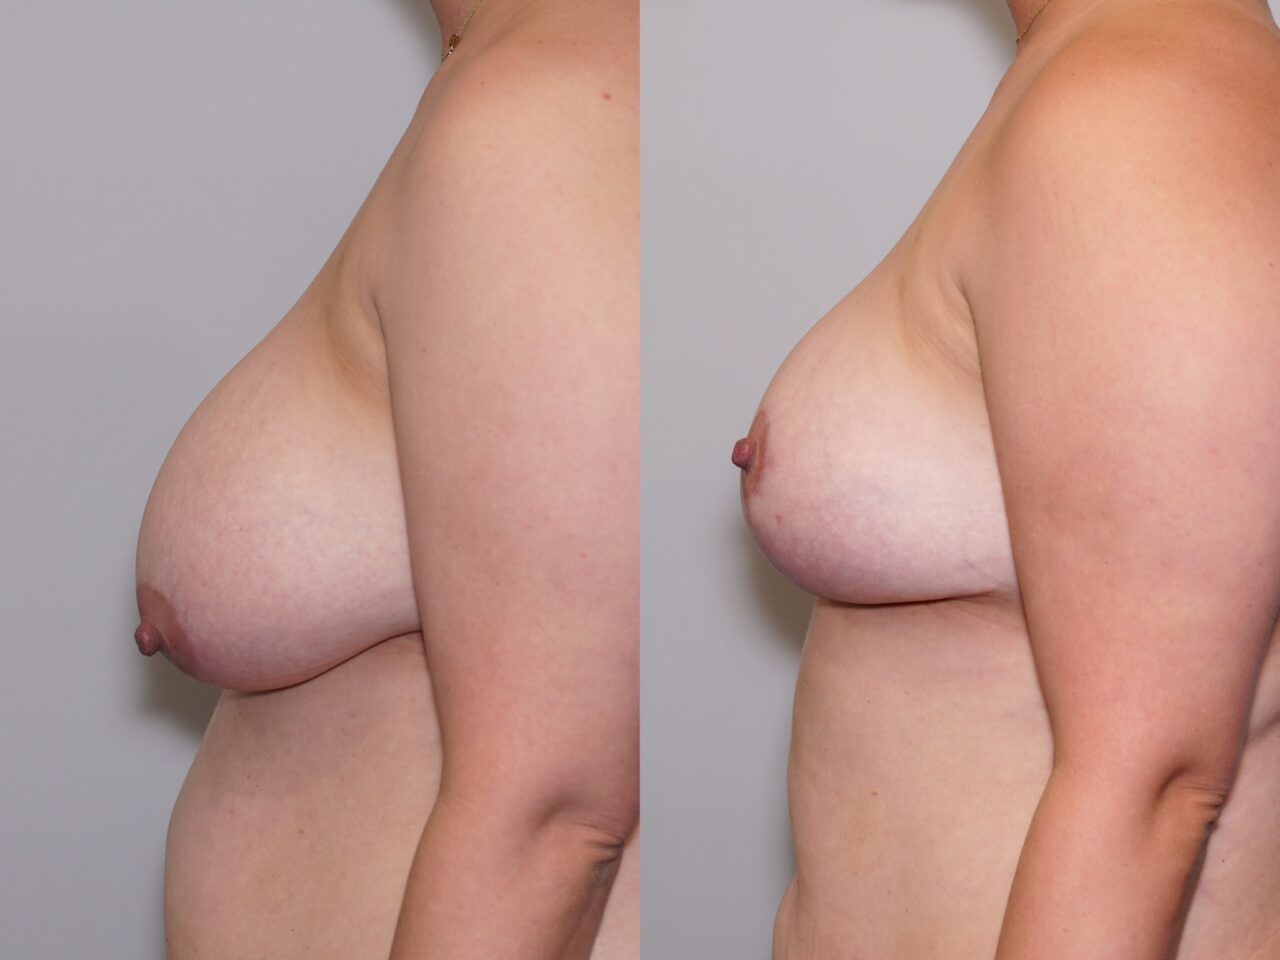
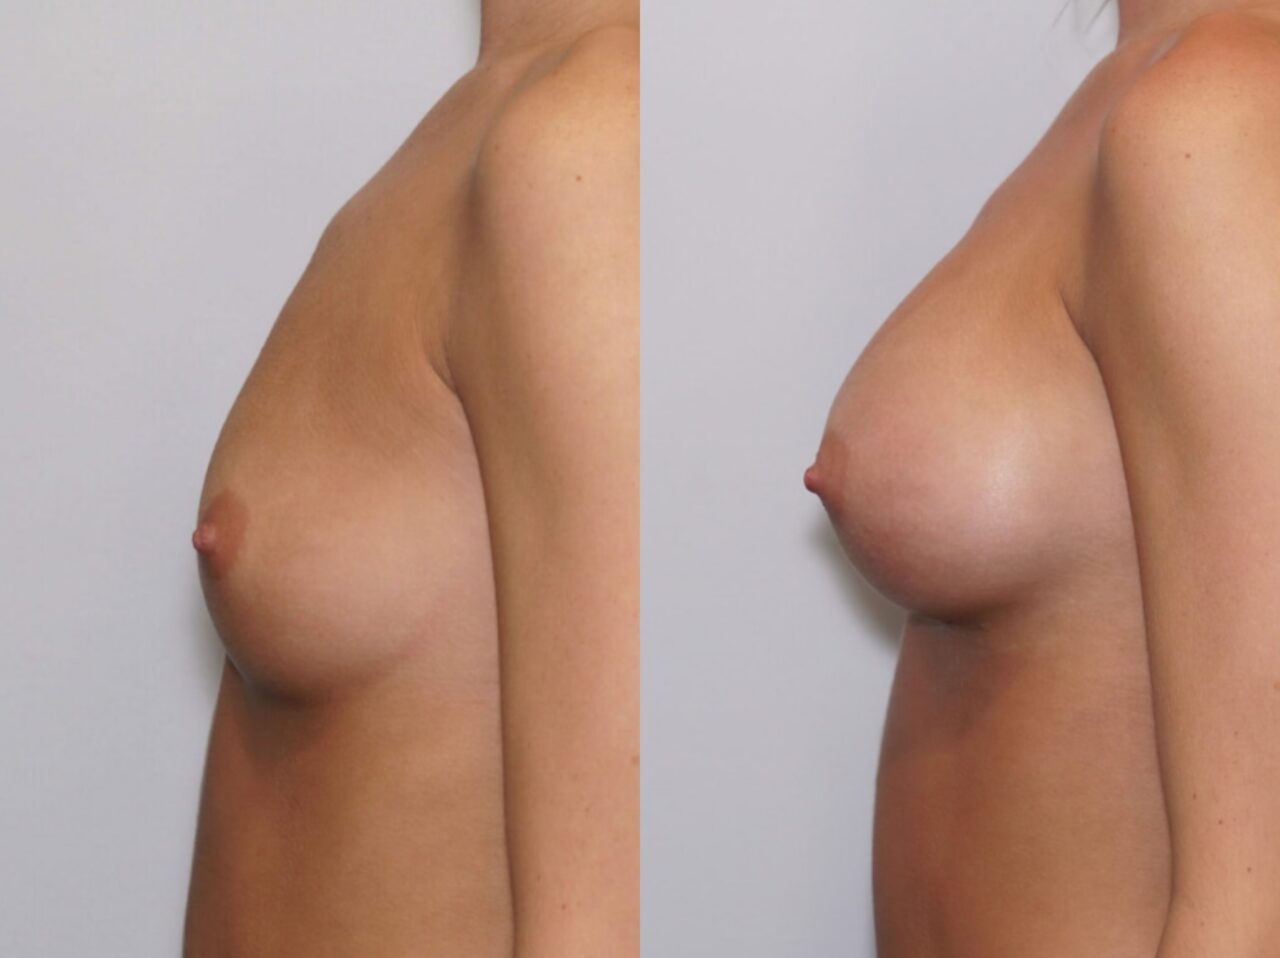
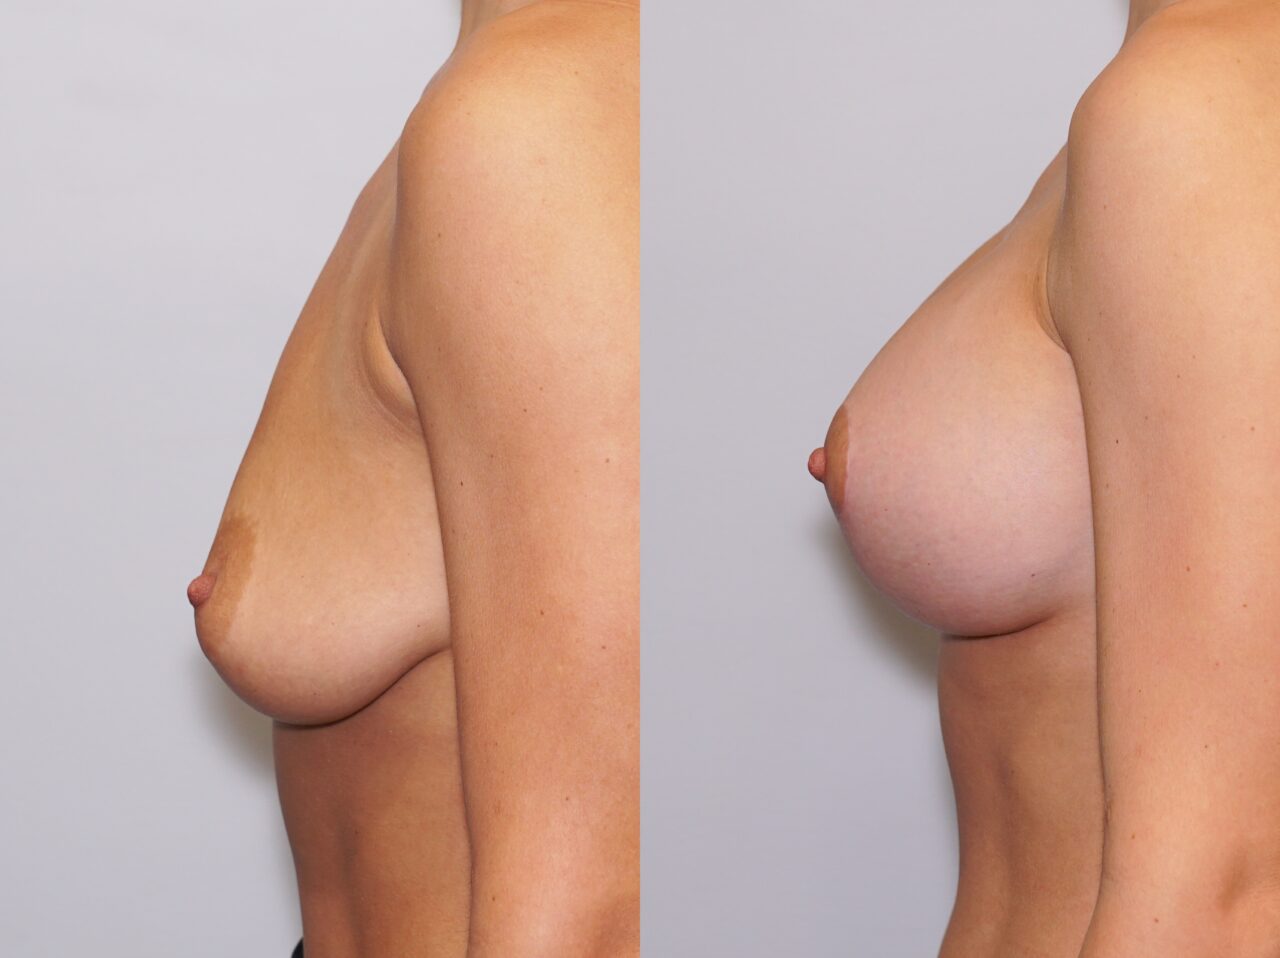
This patient was an A cup on the right and a small B on the left. Her chest wall was depressed on the right side. A High Profile 400cc Silicone Implant was placed on the right and a Moderate+ Profile 339cc Silicone Implant was placed on the left. She is now a full C cup on both sides.
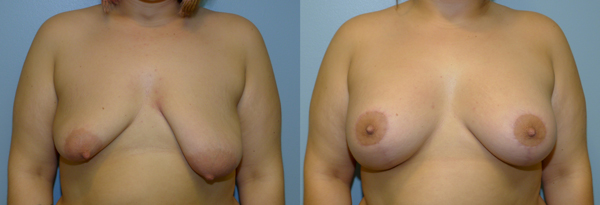
This patient was an B cup on the right and a C cup on the left. She also had a developmental deformity of her breasts. A breast lift with 405 cc and 360 cc saline implants were used to correct her deformity. She is now a D cup on both sides.
How do I choose my cup size?
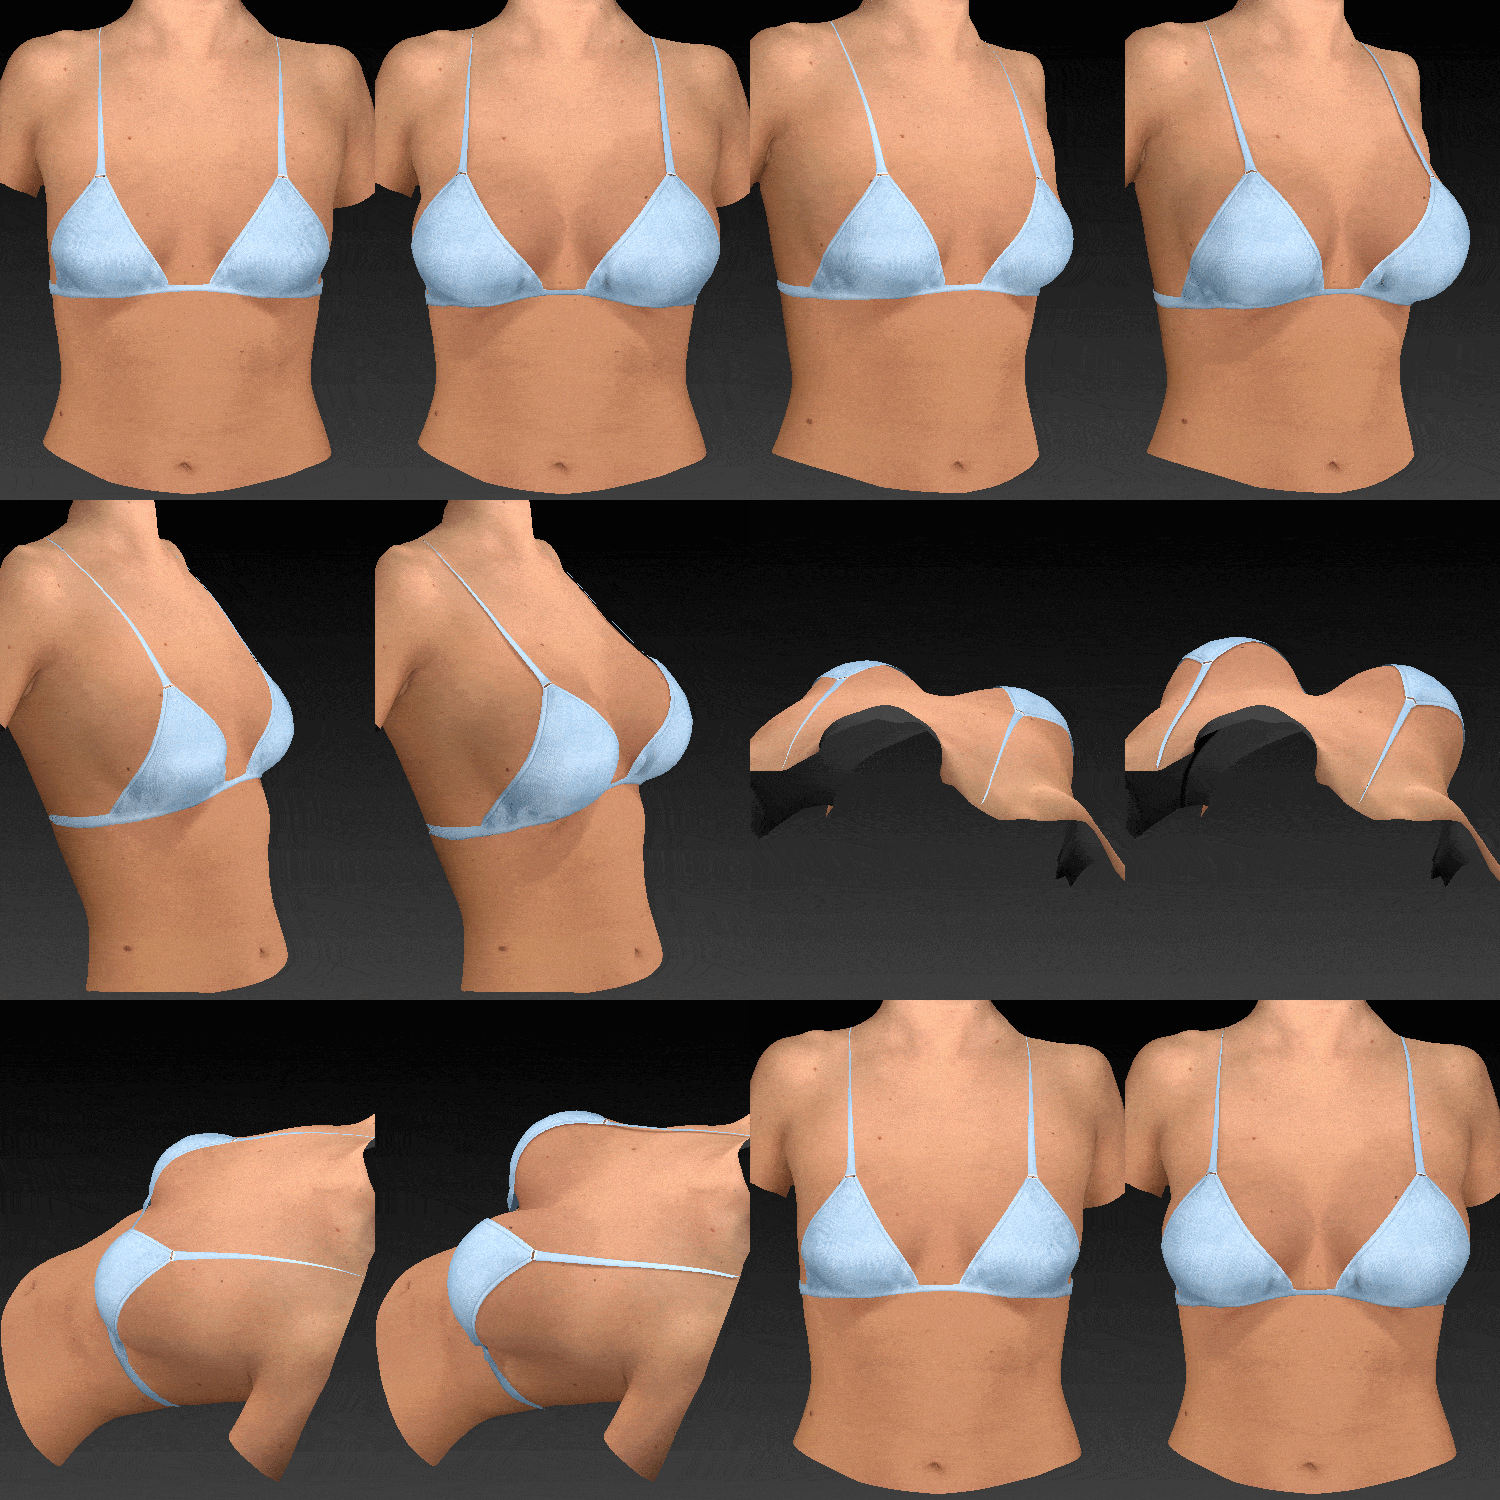
Vectra 3D Imaging
See your results before surgery by having the machine take your photo then instantly see your 3D image on the screen. The implants for every company are built into the software so you can virtually try on every implant size on your body. Go from an A to a B, C, D, or even DD on the screen.
The benefits of the Vectra 3D imaging:
- Easier than trying on implants
- 90% accuracy based on studies
- Better visualization
- Can try with and without a bra
- Print your images and take home
- View from every angle
How do I know how much breast sagging I have?
How long before my breast implants drop?
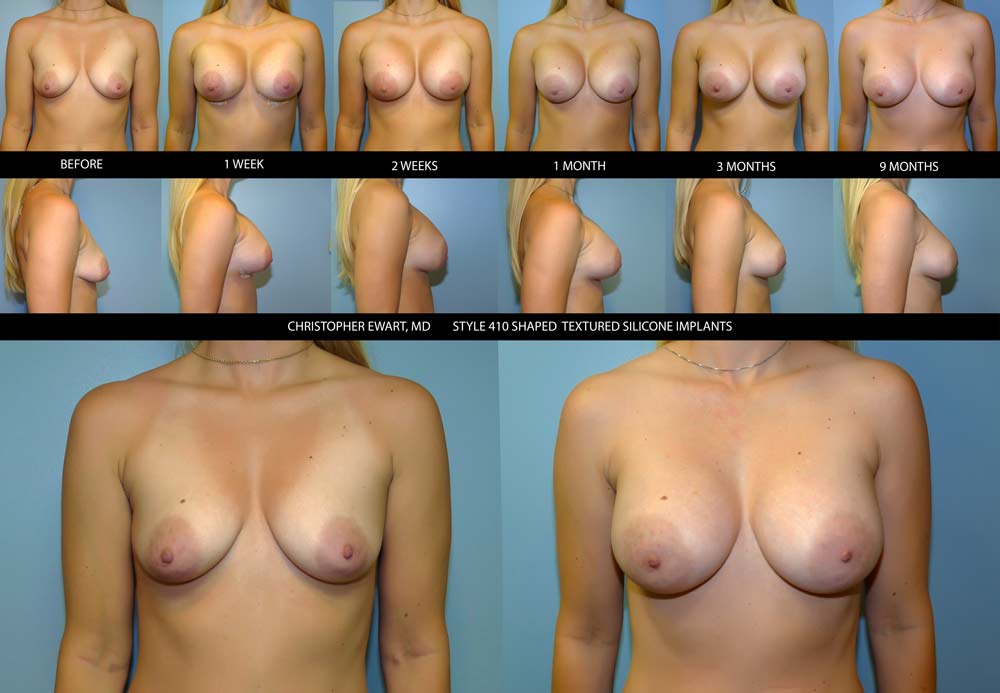
When breast implants are placed into a submuscular position, the normal reaction of the body is to contract the muscles and abnormally elevate the breast implants. In addition the skin is tighter and needs to relax as well. Over the course of a few weeks to a few months, the implants will continue to drop into a more natural position. They will continue to look more natural over the course of 9-12 months but most of the dropping occurs in the first 3 months. *Individual results may vary
What are some other breast sizing options?
Try on implants beneath a sports bra
We can let you feel and see the different implants and you can try different sizes beneath a sports bra. By trying on different sizes in each breast, you may be able to determine which size looks better on your frame. Be sure to bring a fitted shirt for better accuracy.
Try the Rice Test at home
The rice test is a quick and easy way to get an idea of how you would look with different sizes of breast implants. Just follow the instructions below to make rice implants. After making several sizes, place them inside of a sports bra to get an idea of how breast implants of different cc volumes would enhance your figure.
Rice Amount Estimated Implant Volumes
- 1 cup = 236cc
- 3/4 cup = 177cc
- 2/3 cup = 156cc
- 1/2 cup = 118cc
- 1/3 cup = 78cc
- 1/4 cup = 59cc
- 1/8 cup = 30c
Instructions: Use some knee high or cut-off panty hose to fill with the rice to different sizes. This will give you an approximate size and be very useful when discussing your size options with Dr. Ewart or Dr Tarakji. This will get you in the right range and then you can narrow it down when using our 3D Vectra imaging.
What type of breast implants are available in Augusta at APS?
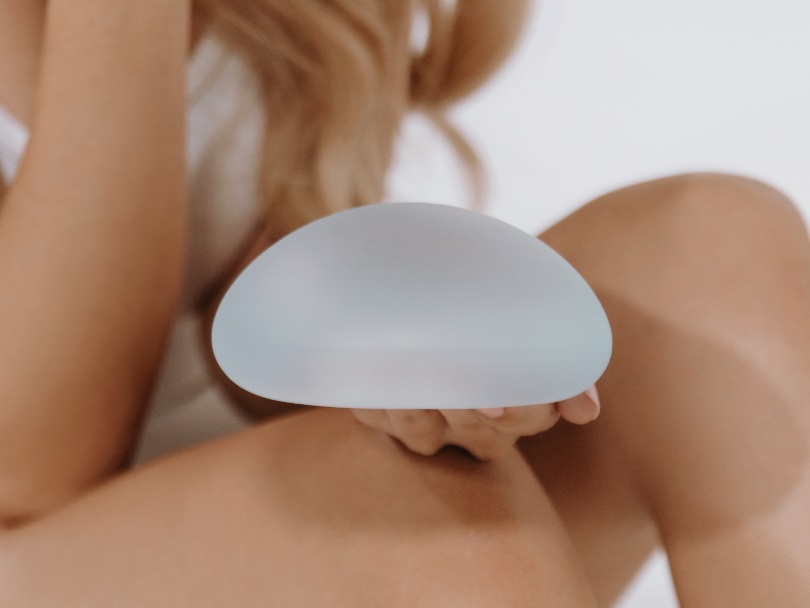
Now Offering Motiva that has a smooth silk coating that reduces inflammation and the ergonomic model that moves with the body to appear more natural
Motiva SmoothSilk® Round
Combines the SmoothSilk®Surface with ProgressiveGel PLUS, creating increased upper pole fullness and softness. The shape keeps its round, full form regardless of whether you’re standing up or lying down.

Motiva SmoothSilk Ergonomix®
Ergonomix® implants are unique to the implant market, as they can adapt shape as your body changes positions, showcasing a round shape when lying down and a teardrop shape when standing up.This breakthrough implant is designed to be inserted through a small incision and minimize scarring.

Surgery Details
- Anesthesia:
- General
- Location:
- Augusta Plastic Surgery Center located in Martinez. GA
- ASC Certification:
- AAAASF
- Surgeons:
- Dr. Christopher Ewart and Dr. Michael Tarakji
 Inframammary Fold Incision